
Water feature rock staining usually comes from a few repeat causes: mineral scale left behind as splash water evaporates, white deposits from cement-based materials, rusty streaks from iron or metal contact, or organic staining that sticks to damp stone. The long-term fix is not constant scrubbing. It’s identifying the stain, removing it with a stone-safe method, then reducing splash, runoff, and mineral concentration so it does not return. If you want the “built-in” version of that approach, it’s exactly how a water feature contractor plans stone, flow, and detailing from day one.
This guide keeps things practical for Greater Vancouver backyards. You’ll learn how to tell scale from rust from organics, what to try first without damaging the stone, and how to reduce staining with simple water and maintenance changes. You’ll also see when staining is a clue that the feature needs a design or drainage adjustment, not another round of cleaning.
At A Glance
Water feature rock staining is most frustrating when it feels random. In reality, it tends to show up in the same places: where water splashes, where it evaporates, and where fine sediment settles. That pattern is helpful because it means you can usually reduce staining by changing the conditions in those zones.
The goal is not a “perfectly spotless” waterfall 365 days a year. The goal is a water feature that stays close to its original colour, cleans up easily, and does not demand constant attention.
The Quick Checklist To Reduce Water Feature Rock Staining
Start with the lowest-risk steps. You’ll often see improvement just by reducing splash and improving basic circulation, before you reach for any cleaners.
- Confirm the stain type (white crust vs rust vs dark organic staining).
- Reduce splash and evaporation where the staining is worst.
- Keep circulation consistent and filters clean.
- Start cleaning gently (soft brush, test spot, stone-safe approach).
- Consider sealing only if the stone and application are appropriate.
- Address runoff and sediment sources around the feature.
If you feel stuck, take photos of the stain when it’s dry and when it’s wet. Many deposits look similar wet, but look very different dry. That one step can save a lot of trial and error.
What “Good” Looks Like
A clean-looking water feature does not mean you never see any marks. It means staining is light, slow to return, and mostly limited to the high-splash areas where you expect some mineral and dirt exposure.
It also means maintenance stays simple. You can brush and rinse occasionally, clean filters on schedule, and enjoy the sound and movement of water without planning your weekends around stain removal.
What Causes Staining On Water Feature Stones
Most staining comes from a mix of water chemistry, evaporation, and what the stone surface is exposed to day after day. If your feature is in a tight corner under trees, for example, it may stain more from organics. If it gets lots of sun and wind, it may show more mineral scale.
It also matters whether you have a pondless waterfall, a bubbling boulder, a spillway bowl, or a pond. Different styles create different splash zones and different “wet lines,” which changes where deposits build up.
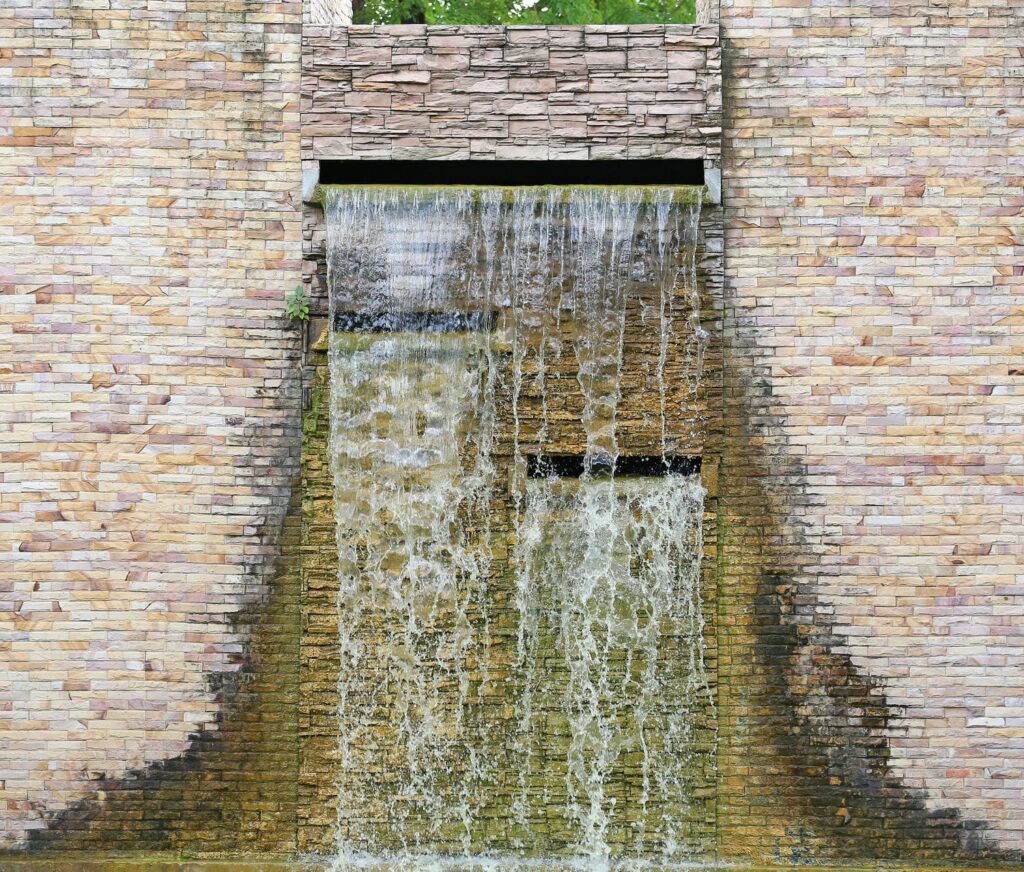
Mineral Scale From Evaporation And Splash
Mineral scale is the classic white crust or chalky film that shows up where water splashes, then dries. As water evaporates, it can leave dissolved minerals behind on the stone surface. Over time, that deposit thickens and becomes harder to remove.
You’ll usually see scale in specific zones, not everywhere. Look for the lip of a spillway, the “fan” area where water breaks over rocks, and spots where droplets land repeatedly. Those are the areas to target first with splash control and gentler cleaning.
Efflorescence From Mortar, Concrete, Or New Builds
Efflorescence can also look white, but it often behaves differently than mineral scale. It can appear when cement-based materials release salts and moisture moves through them, leaving a powdery deposit on the surface as it dries. New builds are more likely to show this while materials cure and moisture levels stabilize.
Efflorescence is not a sign your feature is “ruined,” but it is a sign you should slow down with aggressive cleaning. If you strip or etch the surface, you can create a stone finish that stains faster later. A careful approach and good detailing around mortared areas makes a big difference.
Rust And Metal Staining
Rust staining usually shows as orange-brown streaks that start at a point and run downward with the water path. Common sources include metal fittings, fasteners, certain pump or plumbing components, or iron in the water itself.
Before you clean, find the source. If the source remains, the stain will return quickly, and repeated scrubbing can wear the stone surface. Stopping the source often solves 80% of the problem, then the remaining stain becomes a one-time cleanup.
Organic Stains, Tannins, And Sediment
Organic staining often looks like dark tea-coloured marks, muddy streaking, or a dull film that holds dirt. Leaves, cedar debris, mulch, and soil runoff can all add tannins and fine sediment that stick to wet stone surfaces.
This type of staining is common in shaded yards or where planting beds slope toward the feature. If you remove stains but do not reduce the organic load and runoff, the discolouration tends to come back, especially in fall and winter.
Identify Your Stain Before You Clean It
Two stains can look similar and need very different handling. White buildup might be mineral scale, efflorescence, or even residue from previous cleaners. Dark staining might be tannins, sediment, or a biofilm that traps dirt.
A quick identification step prevents damage. It also keeps your plan simple, because you only treat the stain you actually have. Use this as a starting point. If you’re unsure, treat the stone as sensitive and start with the gentlest method and a small test spot.
| Stain Look | Likely Cause | Safe First Step |
| White crust or chalky film in splash zones | Mineral scale from evaporation | Soft brush and rinse, then test a stone-safe cleaner on a small area |
| White powder near mortared or cemented areas | Efflorescence | Gentle dry brush, avoid aggressive acids, monitor if it reduces over time |
| Orange or brown streaks below a point | Rust or iron staining | Locate the source point first, then test a stone-safe approach |
| Dark tea-like staining near trees or mulch | Tannins and organics | Remove debris sources, gentle cleaning, improve circulation |
| Slimy dark film that holds dirt | Biofilm or organic growth | Improve circulation and routine maintenance, then gentle cleaning |
Prevention Starts With Smart Detailing

Most long-term stain reduction comes from build details, not stronger cleaners. Denser stone, cleaner splash zones, and better runoff control reduce how much staining can form in the first place. That keeps maintenance light.
If your feature is already built, you can still apply these ideas. You may not change everything, but small tweaks often cut staining dramatically.
Choose Stone That Handles Water Better
Stone varies in porosity and surface texture. In plain terms, some stone absorbs more and holds deposits more tightly, while denser stone tends to clean up easier. That does not mean one stone is “good” and another is “bad.” It means the maintenance plan should match the material.
If you’re planning a new feature or replacing stone in splash zones, it helps to think the same way you would for other wet, exposed hardscape areas. Our work on natural stone walkways often comes down to the same practical question: how will this stone look and perform after repeated rain, runoff, and cleaning.
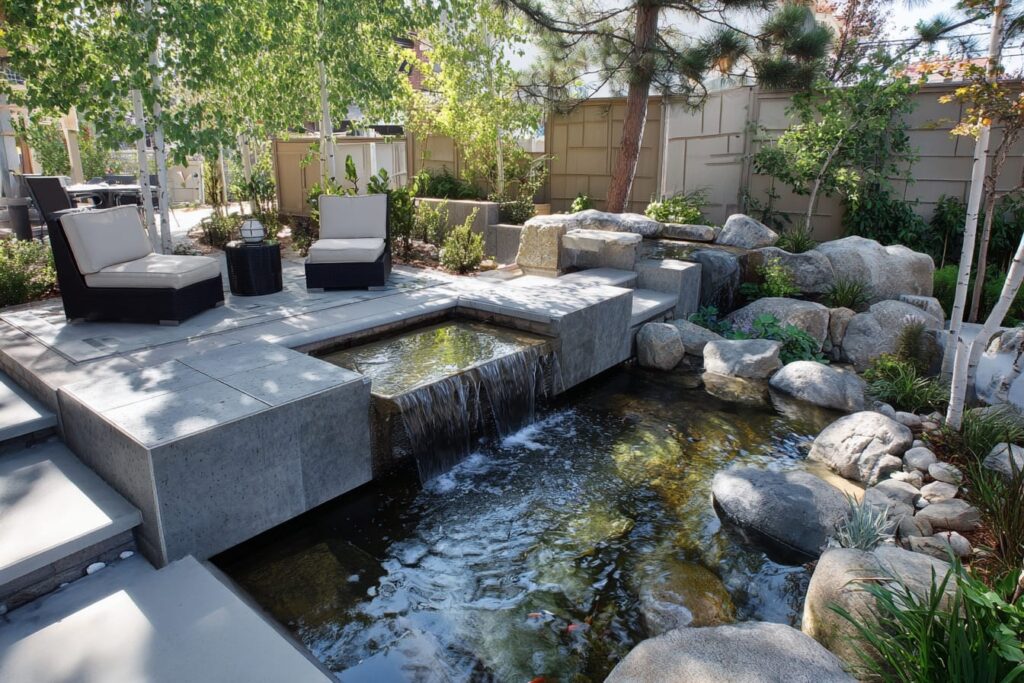
Control Splash Patterns And High-Evaporation Zones
Staining concentrates where water breaks, aerates, and sprays. A small change in flow, spillway shape, or rock placement can reduce constant wetting and drying on the same stones. That wet-dry cycle is what builds the “ring” of mineral deposits over time.
You do not need to eliminate splash entirely. You want to reduce repeated overspray onto stones that are meant to stay mostly dry. When the splash zone is tighter, stains stay contained and easier to manage.
Manage Runoff And Sediment Around The Feature
Many “stone stains” are actually dirt and organics being washed into the basin, then redistributed onto wet rock. If the grade around the feature slopes toward it, the feature becomes a collection point for soil fines and mulch.
Water Management That Reduces Mineral Buildup
Staining is not only about the stone surface. It’s also about what the water carries, how often the water evaporates, and how well the system stays clean. Water that looks clear can still deposit minerals where evaporation is high.
A calm way to approach this is to control what you can control: your water source, your circulation habits, and your “wet line” on the stone.
Start With Your Water Source
If you see repeated white scale, it’s worth understanding your local water quality and whether minerals may be contributing. Mineral levels can vary across the region and by municipality, and water quality reporting can help you confirm what you’re working with.
Even if your municipal water is generally soft, evaporation can still concentrate minerals over time, especially in summer. That’s why topping up habits and splash control still matter.
Circulation, Filtration, And Topping-Up Habits
Poor circulation creates stagnant zones where fine sediment settles and organic film builds. That film acts like glue for minerals and dirt, so staining becomes more visible and harder to remove. Keeping flow consistent and filters clean reduces the “sticky layer” that makes deposits cling.
Topping up is another quiet factor. If you top up often during warm months, minerals can build gradually as water evaporates and gets replaced. You do not need to overthink it, but you do want to be consistent about basic maintenance and avoid letting the feature run low and then refilling heavily in a cycle.
Reduce The “Constant Wet Line”
The most stubborn staining often sits on stones that are constantly wet but not fully submerged. That zone gets repeated evaporation, repeated deposits, and repeated exposure to air and sunlight.
If you can reduce the height or width of that wet line, you usually reduce staining. That might mean tightening the spill pattern, adjusting the water return, or changing which stones take the brunt of splash. Small changes here often lead to the biggest improvement.
Cleaning Methods That Are Safer For Stone
Cleaning works best when you treat the stone with respect and start gently. Some stones handle stronger methods, while others etch, lighten, or become more porous if you use harsh cleaners or high pressure. Once that happens, staining can return faster.
A safe cleaning plan aims for steady improvement, not instant perfection. It also protects your pump, basin, and surrounding plants.
Start With The Gentlest Option And Test A Small Area
Begin with a soft brush and water, and focus on the stained zone only. If you need a cleaner, choose a stone-safe option intended for the type of deposit you have, and test it in a small, less-visible area first. That test spot tells you how the stone reacts before you commit to the full surface.
If your feature includes fish, plants, or drains to sensitive landscape areas, be extra cautious. Many cleaners and rinses can affect water quality and nearby soil. When in doubt, remove stones for cleaning off-site or talk to a contractor about a safe approach.
What To Avoid
A few common shortcuts create more problems than they solve. They can damage the stone surface, spread staining, or make future buildup worse.
- Aggressive acids on sensitive stone
- High-pressure washing that opens the surface and increases future staining
- Mixing chemicals or “experimenting” without a test spot
- Cleaning the stain without stopping the source (iron, runoff, or splash)
- Scrubbing across delicate finishes that can scratch or dull the stone
If you’ve already tried a harsh method and the stain returns faster, it may be because the stone surface changed. In that case, the prevention steps become even more important.
When Sealing Helps And When It Hurts
Sealing can help some stone resist absorption and make cleanup easier, especially in splash zones. However, sealing is not automatic. The wrong sealer, or the wrong application, can trap moisture, create blotchy darkening, or peel over time. It can also change how the stone looks when wet, which surprises many homeowners.
When To Call A Pro
If staining is light and slow, you can usually manage it with gentle cleaning and better prevention. If staining returns fast, or looks like it’s coming from the build, it’s worth getting help. That’s especially true if the feature is integrated near patios, walls, or grade changes.
A pro visit is not about selling a bigger project. It’s about finding the cause, then choosing the smallest fix that gives you long-term results.
If staining returns within days, you likely have an active source, like heavy overspray, runoff feeding sediment, or a constant wet line that keeps depositing minerals. Persistent white deposits around mortared areas can also point to moisture movement that needs better detailing, not harsher scrubbing.
If your feature collects soil after every storm, or if the basin area stays muddy, drainage and grade are usually part of the solution. In those cases, cleaning alone will always feel like a losing cycle.
Keep Your Water Feature Looking Clean Without Constant Scrubbing
Staining is usually not a “bad stone” problem. It’s a pattern problem: minerals plus evaporation, splash plus wet lines, and sediment plus runoff. Once you identify what’s driving the discolouration, you can make small changes that reduce how often you need to clean, and how hard you need to scrub.
If you want a stress-free water feature installation, Umbrella Constructions works with fixed-price contracts, a detailed build schedule, and structured updates with progress photos so you can enjoy every step of the journey and end up with a feature that stays clean-looking longer. For design, upgrades, or new builds, explore our custom water features services.
Frequently Asked Questions
What Causes White Stains On Water Feature Rocks?
White staining is often mineral scale left behind when splash water evaporates on the stone. It can also be efflorescence from cement-based materials in newer builds. The best first step is identifying which one you have, because the cleaning approach can differ. If the deposit is mostly in splash zones, scale is more likely. If it appears around mortared areas, efflorescence may be involved.
How Do I Remove Mineral Buildup Without Damaging Natural Stone?
Start with the gentlest approach: soft brush, water, and a test spot before you do a full cleanup. If you use a cleaner, choose a stone-safe product intended for mineral deposits and follow the manufacturer directions closely. Avoid aggressive acids and heavy pressure washing unless you’re sure the stone can handle it. Many stones etch or become more porous, which can make future staining worse.
Why Does My Water Feature Keep Staining Even When The Water Looks Clear?
Clear water can still contain dissolved minerals, and staining often forms where water splashes and evaporates. You can also have a thin film on the stone that traps fine sediment, making stains look darker even when the basin looks clean. If you top up often during warm months, minerals can slowly concentrate as water evaporates. That’s why splash control and consistent filtration matter.
Is Rust Staining On My Water Feature Stone From The Water Or The Hardware?
It can be either. Rust streaks often trace back to a metal fitting or contact point above the stain, but iron in the water can also contribute. Finding and stopping the source is usually more effective than repeated scrubbing. If the stain starts at a single point and runs downward, look for a source point first before you clean.
Should I Seal Water Feature Stone To Prevent Discoloration?
Sometimes sealing can help, especially on certain stones in splash zones. However, it depends on the stone type, the finish, and the sealer choice. The wrong sealer or application can cause blotching, trap moisture, or peel. If you’re unsure, test in a small area or get advice based on your exact stone and water feature setup.
Is Black Or Green Discolouration Mineral Staining Or Algae?
It may be organic growth or a biofilm that holds dirt, not mineral scale. If it feels slimy, improving circulation and basic maintenance often matters more than mineral-focused cleaning. If organics are the main issue, focus on debris removal, filtration, and flow. Keep chemical use cautious, especially if water drains into planted areas.
How Often Should I Clean Water Feature Rocks?
Light weekly maintenance and a monthly check of splash zones and filtration usually prevents heavy staining. If you need aggressive cleaning often, it usually means the cause is still active, like overspray, runoff, or a constant wet line. A good system reduces the need for hard cleaning. Your goal is “easy touch-ups,” not constant scrubbing.